CoNet - Documentation - Tutorial (arctic soils data)
The goal of this tutorial is to demonstrate network construction from a QIIME OTU table and mapping file, including p-value computation.
For this tutorial, a demo presentation is available, which illustrates each step. You can download the demo presentation in pdf format here.
Tutorial files
demo presentation
arctic soils biom table, needs to be converted first as shown below
arctic soils OTU table including lineages (suitable for CoNet)
arctic soils mapping file (needs processing)
arctic soils feature file (suitable for CoNet)
test settings file (for computation of the initial network)
permutation settings file
bootstrap settings file
precomputed permutation random scores
precomputed bootstrap random scores
Data acquisition
You can download the files required for this tutorial from the QIIME database. Please select the "Chu_arctic_soils" study (published here). Alternatively, you can use the files listed above.1. Step: OTU table extraction
After unzipping of the QIIME file, you will find a biom file there, which you can convert into an OTU table using the biom tool available at http://biom-format.org. If you use the following command:
biom convert -i study_104_closed_reference_otu_table.biom -o arctic_soils.txt -b --header-key taxonomy
you will obtain an OTU table that includes the lineages. In case you want to skip any of these steps, you can also download the biom or OTU table from above.
2. Step: Feature extraction
The QIIME zip file also contains a mapping file (study_104_mapping_file.txt). This mapping file lists for each sample a number of metadata, such as primers, run date etc. You can open this mapping file in Excel and copy the "#SampleID" column and the "PH" column into a new sheet, with the "#SampleID" column as first and the "PH" column as second column. Then remove the # from the "#SampleID", since # is interpreted as starting character of a comment line. You can then save the two columns into a tab-delimited file. This processed mapping file is the feature file that is given to CoNet separately from the OTUs. Both mapping file and feature file are available among the tutorial files.3. Step: Permutation
Note that the permutation step can be skipped by loading precomputed permutations in the bootstrap step. The computation of permutations takes roughly 10 minutes.Short version (using the CoNet settings file)
- Open the CoNet plugin in Cytoscape and click the "Settings loading/saving" button.
- In the Settings menu, click "Select file" and browse the file tree to the permutation settings file.
- Click the "Apply settings in selected file" button and close the Settings menu.
- In the Data menu, click on the top-most "Select file" and browse the file tree to select the arctic soils OTU table.
- In the Metadata and Features submenu, in the bottom-right "Features" box, click "Select file" and browse the file tree to select the arctic soils feature file.
- In the Randomization menu, in the "Save" box, click "Select folder" and choose the folder where permutation scores will be saved. Specify the name of the permutation score file, then enable "Save randomizations to file".
- In the main menu, click the GO button.
Long version (entering everything manually in the CoNet interface)
- Open the CoNet plugin in Cytoscape and open the Data menu
- In the Data menu, click on the top-most "Select file" and browse the file tree to select the arctic soils data file.
- Enable the "Table obtained from biom file" check box.
- Click the "Metadata and features" button to open the metadata submenu.
- In the Metadata submenu, enable the "explore links between higher-level taxa" and "Parent-child exclusion" check boxes.
- In the Metadata and Features submenu, in the bottom-right "Features" box, click "Select file" and browse the file tree to select the arctic soils feature file.
- Enable the transpose and match samples check boxes.
- Close the Metadata and Data menus and open the "Preprocessing and filtering" menu.
- Enable "row_minocc" and set it to 20.
- Enable "col_norm" standardization.
- Close the "Preprocessing and filtering" menu and open the Methods menu.
- Enable the "Pearson", "Spearman", "Mutual information", "Bray Curtis" and "Kullback Leibler" check boxes.
- In the Methods menu, click the "Automatic threshold setting" button.
- In "Automatic threshold setting" sub-menu, select "edgeNumber" and set edge selection parameter to 1000.
- In "Automatic threshold setting" sub-menu, enable "Top and bottom".
- Close the Methods menu and its "Automatic threshold setting" sub-menu and open the "Randomization menu".
- In the Randomization menu, select "edgeScores" as randomization routine and "shuffle_rows" as resampling method.
- Enable "renormalize".
- In the Randomization menu, in the "Save" box, click "Select folder" and choose the folder where permutation scores will be saved. Specify the name of the permutation score file, then enable "Save randomizations to file".
- In the main menu, click the GO button.
4. Step: Bootstraps
The computation of bootstraps takes roughly 10 minutes.Short version (using the CoNet settings file)
- Open the CoNet plugin in Cytoscape and click the "Settings loading/saving" button.
- In the Settings menu, click "Select file" and browse the file tree to the bootstrap settings file.
- Click the "Apply settings in selected file" button and close the Settings menu.
- In the Data menu, click on the top-most "Select file" and browse the file tree to select the arctic soils OTU table.
- In the Metadata and Features submenu, in the bottom-right "Features" box, click "Select file" and browse the file tree to select the arctic soils feature file.
- In the Randomization menu, in the "Load null distribution" box, click "Open file" and select the permutation score file generated in the previous step (if you skipped the permutation step, download the precomputed permutations).
- In the main menu, click the GO button.
Long version (entering everything manually in the CoNet interface)
This step assumes that you also performed permutations with the long version, i.e. by entering all options manually.
- Open the "Randomization menu", select "bootstrap" as resampling method and disable "renormalize"
- Empty all text fields in the "Save" box and disable "Save randomizations"
- In the "Load null distribution" box, click "Open file" and select the permutation score file generated in the previous step (if you skipped the permutation step, download the precomputed permutations).
- Enable "brown" as p-value merge method and enable the filtering of unstable edges.
- Select "benjaminihochberg" as multiple test correction method
- In the main menu, click the GO button.
Result
The network returned by CoNet has no layout, as layout computation can be time-consuming, depending on the chosen algorithm.
You can layout the network using one of Cytoscape's supported layouts, for instance the yFiles-layout Organic.
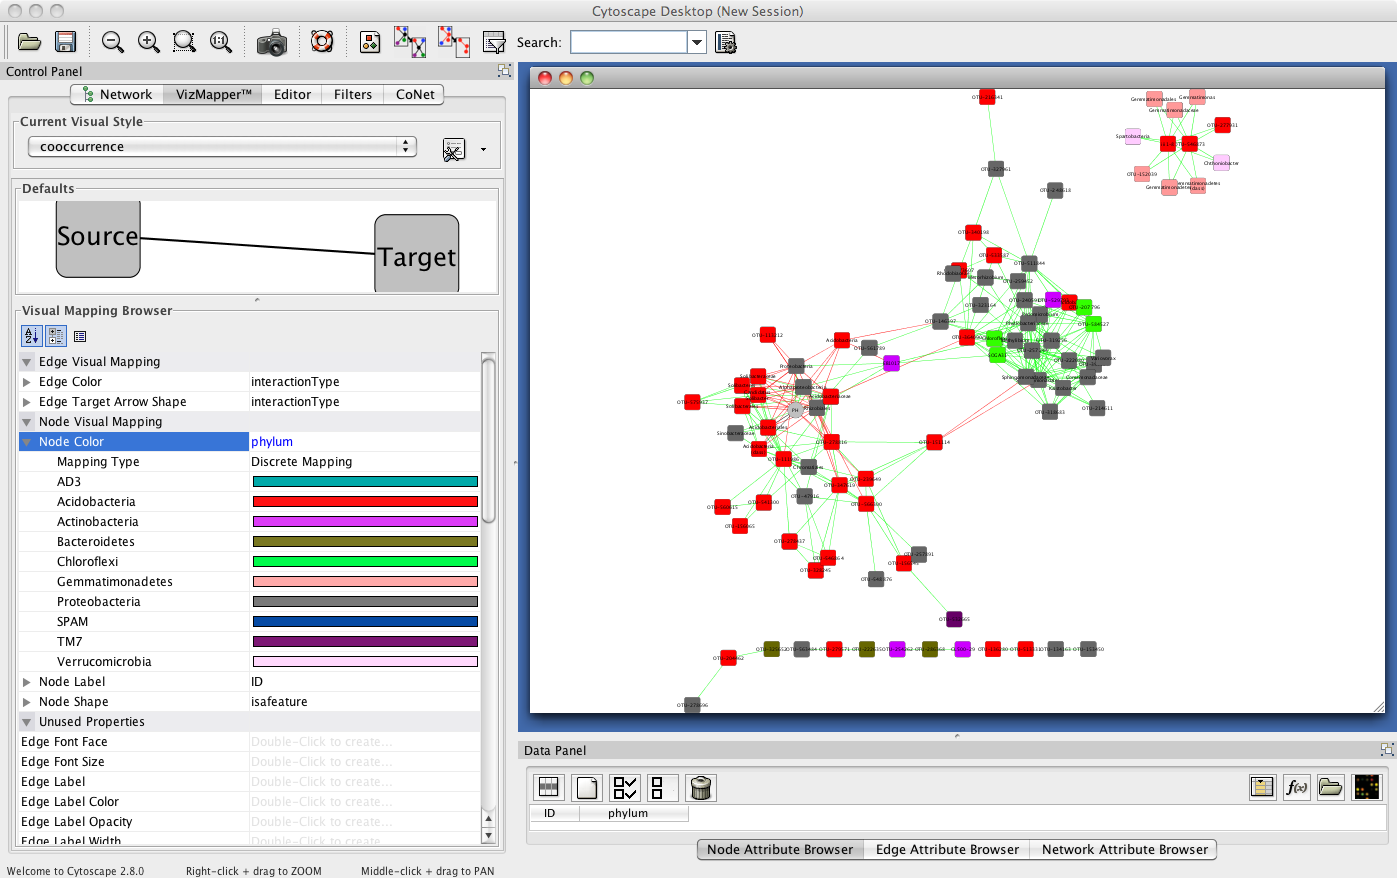
You can then use the VizMapperTM to set phylum-specific node colors. After these processing steps, the network
looks like this:

